The World's Only Pocket no Naka no Oukoku Fanpage IntroductionPocket no Naka no Oukoku (ポケットの中の王国, Kingdom in Your Pocket) is a hybrid adventure/simulation game by Hect, best known as the developers of Moon Crystal. It's also possibly the most obscure commercially developed Game Boy game in existence. 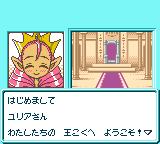 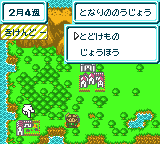 I'm not exaggerating here; absolutely no one outside of the Japanese Internet seems to have ever discussed the game, and even then there's virtually nothing. My searches have turned up one Famitsu blurb previewing the game, one unexplained namedrop in a 2ch thread discussing good Game Boy games (see post 69), and a few entries in unreleased game lists like this and this. Oh, and the ever-helpful Wikipedia acknowledges that it was "Canceled in Japan" (in addition to, you know, the rest of the world). 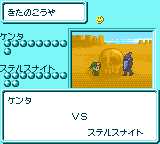 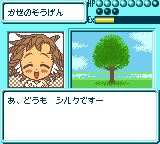 So what with not actually being released and all, it's not too surprising the game went under the radar. The Famitsu preview pegs it for a January 2001 release, but it got pushed back and ultimately cancelled. Most likely it was a victim of the ongoing collapse of its developer, which went out of business in 2002. Despite being cancelled, a ROM of the mostly-finished game inexplicably materialized onto the Internet at some point before November 10th, 2007, when it appeared in GoodGBx 3.14 (it was probably added much earlier, but good luck tracking down old versions to check). 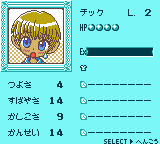 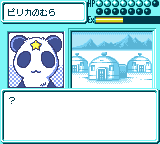 The leaked game identifies itself internally as version 0.950, built on March 7th, 2001, and I would estimate that it's 75-80% done; it can be played from start to finish, but the last few areas are obviously incomplete and it has several glaring bugs.   As far as I can tell, no one besides me has played the game to any real extent (except maybe that one BBS poster – who are you??), and I'm probably the first person other than the developers to actually finish it. Since it's really a nice little game and deserves better than its current obscurity – and it's too big and too unfinished to stand a chance of getting translated – I decided to write this so that Google can turn up at least one page about it that isn't a ROM site parroting No-Intro. Bugfix PatchUse this if you plan on playing the game!Download Bugfix Patch v1.0The only known dump of the game contains several major bugs, the worst of which can make it impossible to progress past the end of the second in-game year. I've created this patch to address these issues. See the patch readme for information on how to apply it (it's a standard IPS patch). The following issues are fixed by this patch:
The following issues are not fixed by this patch! Try to avoid them.
Game GuideTable of Contents
About This GuideThis walkthrough only lists the sequence of events needed to complete the plot. Side areas are not covered (see "Sidequests" for those), and it's up to you to train, equip, and rest the hobbits so they can complete their tasks. The game is fairly open-ended, and many events can be done in a different order or simultaneously, so this isn't the only way to play. Note that there's a random factor to some events, so they aren't guaranteed to occur the first time you go to an area. If something doesn't happen when the walkthrough says it should, try repeating the specified action several times. This guide assumes you have at least some rudimentary knowledge of the Japanese language and can manage the menus and such yourself. This is a text-heavy adventure game, and you're frankly not going to get much out of it if you don't know the language to at least that extent. You can get through the game without knowing too much anyway (I'm testament to that). How to Play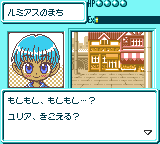 The framing device of the story is that you, the player, are contacting the inhabitants of a kingdom in another world through their crystal balls. You're put in charge of a band of hobbits to whom you issue weekly orders, and your goal is to guide them on their quest to gather the eight Legendary Jewels. 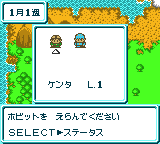 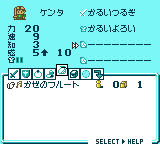 At the start of each in-game week, you can change your hobbits' equipment and order each one to do an activity. During the week, they'll travel wherever you sent them and submit reports on their findings, occasionally asking you to make a decision for them. At the end of the week, they usually return to the Hobbit Village and gain experience and/or stats, though certain activities may require them to stay out longer than a week. In-game time is based on a simple artificial calendar: 4 days = 1 week 4 weeks = 1 month 8 months = 1 year 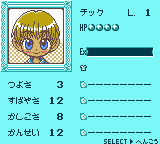 Hobbits have a semi-hidden "motivation" stat indicated by the state of their portrait on the status screen. If they look unhappy, they have low motivation and are likely to perform poorly. Motivation is lowered by engaging in tiresome tasks like training, or by losing a lot of HP. To restore motivation, let the hobbit rest by giving them no weekly orders until they recover. 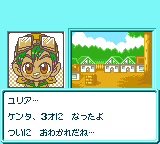 For the first part of the game, hobbits will leave your party after two game years, forcing you to recruit replacements. Plot events later remove this two-year limit and allow you to re-recruit previously departed hobbits. For gameplay purposes, all hobbits are interchangeable. WalkthroughGame Start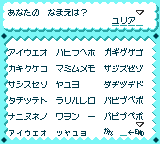 After naming yourself, there's an introduction in which you meet Queen Filia (フィリア王女) and your two starting hobbits, and get an explanation of the Hobbit Village (ホビットのさと). Your initial crew is slightly randomized – the first hobbit will be either Puck, Kenta, or Arty (パック・ケンタ・アーティ) and the second will be either Camil, Tick, or Hazel (カミル・チック・ヘイゼル). They're identical other than names and palettes. You'll be stuck with this initial pair for the first two game years; at that point, they retire and you can recruit replacement hobbits. 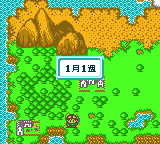 After the introduction, send a hobbit to the Queen's Chamber (王女のところ) in Lumious Castle (ルミアスじょう). At the end of the week, you'll unlock the rest of the menu options and receive some armor from the Queen. Do anything you want for the next week. At the end of the week, the Queen will give you a tutorial on items. The Queen now tests you by giving you the Wind Flute (かぜのフルート). You need to equip it to a hobbit, then send them to the Queen's Chamber. The hobbit you send will eventually find the queen and receive the Queen's Parcel (王女のつつみ), unlocking the Neighboring Farm (となりののうじょう). 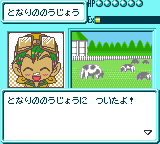 Equip the Queen's Parcel to a hobbit and have them Deliver (とどけもの) it to the Farm. There, you'll be asked to find some White Clover (シロツメグサ) on the newly-unlocked Northern Mountain (きたのいわやま). 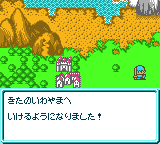 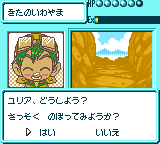 Search the Northern Mountain. You'll discover the Picnic Route (ピクニックルート); your hobbit will immediately ask permission to climb it. There are a number of things that can go wrong while trying to climb the Picnic Route. Your hobbit may encounter a bridge and fall off while trying to cross it, dumping them in the Western Forest (にしのもり) for the remainder of the week. More seriously, they can get lost or run out of HP, leaving them stranded. If this happens, the Queen will explain that you can recover a lost hobbit by sending another hobbit on a rescue mission (order them to search the area where the hobbit got lost). The lost hobbit will come back with an injury (けが), and you'll need to let them rest until they're healed. They may also permanently lose some of their equipment. If your hobbits keep getting lost or falling off the bridge, try leveling up and coming back (perhaps do the Blacksmith's Anvil sidequest, which is available at this point). These events seem to be heavily randomized, though, so you may succeed on the first try or fail repeatedly even at a high level. Eventually, your hobbit will successfully climb the Picnic Route and obtain the White Clover; equip it to a hobbit and then Deliver it to the Neighboring Farm. You'll receive the Sheep's Fleece (ひつじのフリース), an armor, as a reward. 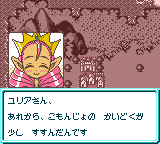 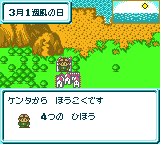 The Queen will now ask you to send a hobbit to her chamber. Doing so unlocks the Northern Wilderness (きたのこうや). Later in the week, the Queen will probably ask you about introducing the combat system, which leads to unlocking the Arena; see "The Arena" under Sidequests. At this point, the first three Legendary Jewels become available. They can be obtained in any order. Jewel of Earth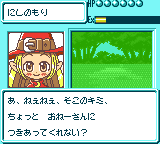 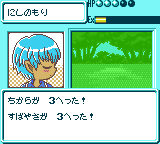 Search the Western Forest. Eventually, you'll encounter Kururu (クルル), a witch. She'll experiment on the hobbit that meets her, increasing their stats. Continue searching the Western Forest until you find Kururu again. She'll perform further experiments, lowering her finder's stats. Now, use the newly-unlocked Find Kururu (クルルをさがす) option in the Western Forest. You'll learn that the owl statue you're looking for is in the Forest Depths (もりのおく). 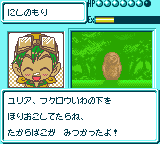 Search the Forest Depths until you get a prompt from your hobbit, then say "yes". You'll eventually unlock the Castle Town (まちはずれ). Go to Wainta's House (ウエンタのいえ) in the Castle Town. You'll learn the location of the owl statue. Now send a hobbit to the Forest Depths again and you'll unlock the Owl Statue (フクロウいわ) option. 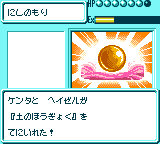 Moving the owl statue requires two hobbits at once. Order one hobbit to go to the Owl Statue as you normally would, and simultaneously order another to the same place (the second time, the option will appear as "フクロウいわS"). The hobbits will uncover the Jewel of Earth (土のほうぎょく). Jewel of Wind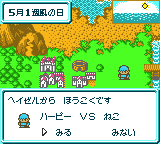 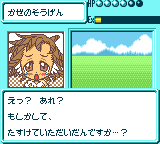 Search the Windy Grasslands continuously (at least three visits). Your hobbit will encounter a blizzard and, after repeated searches, a harpy named Silk (シルク). You'll unlock the Beyond Blizzard (ふぶきのむこう) and Find Silk (シルクをさがす) options. 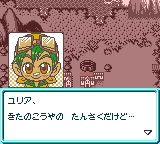 After meeting Silk, search the Northern Wilderness until you get an intermission message from your lead hobbit telling you their blind search doesn't seem to be working. Now use the Find Silk option in the Windy Grasslands, and Silk will tell you how to find the stone skull you're looking for. 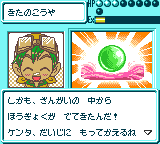 Search the Northern Wilderness repeatedly. Eventually, your hobbit will unlock the Stone Skull (ドクロいわ), which is guarded by a Stealth Knight. Once you beat it, you'll receive the Jewel of Wind (風のほうぎょく). Jewel of Water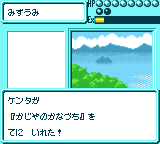 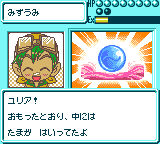 You'll need a hobbit that has the Swimming ability; see the start of the Blacksmith's Anvil sidequest for an explanation of how to achieve this. (If you haven't done the sidequest yet, you'll probably find the Blacksmith's Hammer needed for it while trying to get this Jewel.) Once you have a swimmer, simply send them to Search Underwater at the lake until they find the Jewel of Water (水のほうぎょく). Clearing the Blizzard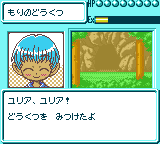 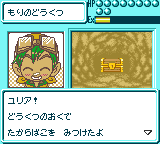 After collecting the three Jewels listed above, the Queen will tell you to talk to Wainta. Go to Wainta's House in the Castle Town to learn about the Forest Cave (もりのどうくつ). Now go to the Forest Depths. Eventually, you'll find the Forest Cave. Repeatedly search it until you find a treasure chest containing the Flame Ring (ほのおのゆびわ). 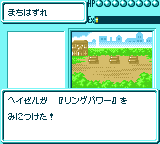  You now need to have a hobbit with a Wisdom (かしこさ) stat of at least 50. Equip them with the Flame Ring, then send them to Wainta's House. Answer "yes" when prompted. The hobbit will gain the Ring Power (リングパワー) skill, and you'll unlock the Twin Towers (ふたごのとう). Search the Twin Towers. You'll unlock and automatically begin exploring the Warrior's Tower (せんしのとう). Defeat the Hammer Golem at the top to get the Amulet of Wind (かぜのおまもり). 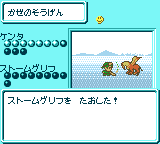 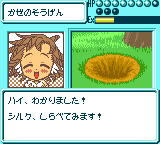 Equip the Amulet of Wind to a hobbit, then use the Beyond Blizzard option at the Windy Grasslands. Answer "yes" at the prompt, then defeat the Storm Gryph to clear the snowstorm. Wait another week; your hobbit and Silk will investigate the elm tree, where they discover that the Jewel has already been dug up. They'll then automatically report to the Queen. This will unlock the eastern part of the world map. 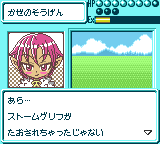 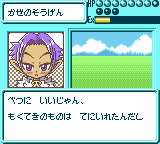 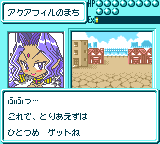 Also, turns out this game has some antagonists! Meet Recette (ルセット), Seth (セス), and Alrata (アルラタ). The Wind Shrines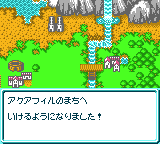 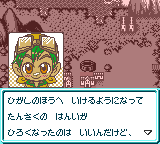 Search the newly unlocked Aquafil City (アクアフィルのまち) in the eastern world map several times. Eventually, your lead hobbit will complain in an intermission message that it takes too long to travel to the eastern area, and will suggest asking the Queen about faster transport. 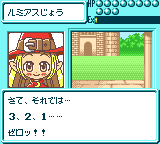 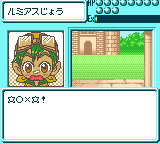 Repeatedly visit the Queen's Chamber. After several spectacular failures by Kururu, you'll meet a Hermit (せんにん), who will tell you about the Wind Shrines (風のほこら) that can be used in conjunction with the Gale Ruby (しっぷのルビー) to teleport. 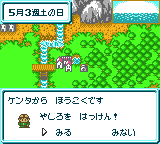 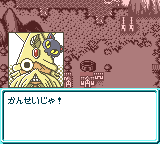 Repeatedly search Aquafil City. You'll eventually unlock the Barrier Forest (こばみのもり), as well as the Morning Calm Port (あさなぎのみなと) if you haven't already, and discover a Shrine near the city. Once all that's done, send a hobbit to search the Barrier Forest until they find the Gale Ruby. Equip the Gale Ruby to a hobbit and send them to the Queen's Chamber. Your hobbits will now be able to warp across the map using Shrines. Hobbit Recruitment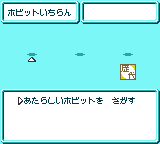 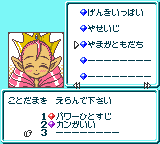 The week after you unlock teleportation, the Queen will inform you that you can now recruit a third hobbit. Hobbit recruitment is simple: you select three desired attributes for your new hobbit, and the game generates a character accordingly. If you select the same attribute multiple times, the new hobbit may start with an advanced rank in that skill. 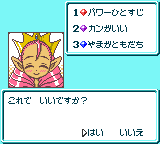  Hobbit recruitment also becomes possible after two in-game years, when your initial two hobbits leave the party. Hobbits recruited after that point can also be freely dismissed. Jewel of Flame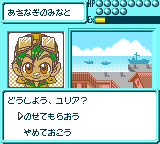 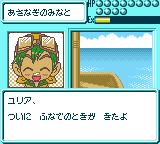 After informing you that you can now recruit three hobbits, the Queen will tell you that the next Jewel is located on a southern island. Have a hobbit use the Southern Sea (みなみのうみ) option at the Morning Calm Port, and tell them to board a ship when they ask. After a few weeks, they'll unlock the Southern Island (みなみのしま). 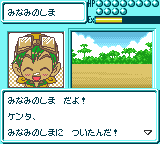 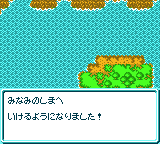 Search the Southern Island repeatedly until all of the following happen:
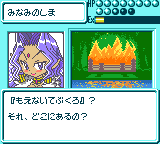 Now use the Search Jungle option until you unlock the Flame Altar (ほのおのさいだん). Visit it until you fight a Shield Devil (your hobbit will automatically visit the altar as soon as they find it, so this fight may happen immediately). Once you beat it, you'll discover that you need the Fireproof Gloves (もえないてぶくろ) to access the Flame Altar. 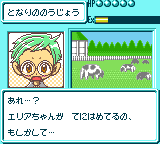 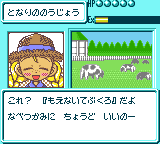 Search Lumious City (ルミアスまち) until you unlock Milly's Tool Shop (ミリーのどうがや) if you haven't already, then search the Tool Shop until you get a report that an unknown person has already bought the Fireproof Gloves. The unknown person is Ellia (エリア), the farm girl; search the Neighboring Farm to get it from her. 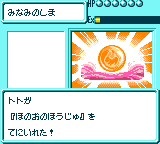 Equip a hobbit with the Fireproof Gloves, then visit the Flame Altar. You'll receive the Jewel of Flame (ほのおのほうじゅ). Jewel of LightAt some point, the Queen will inform you that a Jewel is under the protection of the spirits in the Barrier Forest. This message can trigger before or after finding the Jewel of Flame. If you haven't gotten it by the time you get the Jewel of Flame, wait for a few weeks. I'm not sure what the exact requirement is for triggering this next event; judging by subsequent plot developments, it probably can't occur until a certain amount of in-game time has passed. The earliest I've gotten it to trigger is the fourth week of Month 2, Year 3. 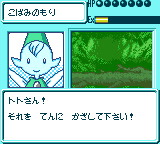 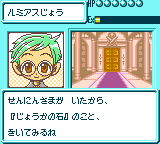 What you need to do is send a hobbit to the Barrier Forest, where they'll get lost. Most of the time, they'll report that they mysteriously found their way back. Eventually, though, one of your hobbits will instead "give up" and stay lost – when this happens, they won't come back at the end of the week. At that point, simply wait. The lost hobbit will meet a fairy, who will tell them that it's having a problem with a Poisonweed monster; you'll need the Purification Stone (じょうかの石) to get rid of it. 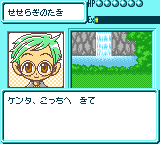 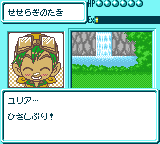 Your hobbit will suggest visiting Kururu to ask about the Purification Stone. You can do this if you want, but she won't have any information. Instead, search Lumious Castle until the Hermit tells you to ask Cornell in Aquafil City. Use the newly-unlocked Appraiser Cornell (かんていやコーネル) option, and you'll in turn unlock the Murmuring Falls (せせらぎのたき). Send a hobbit to search the Murmuring Falls. They'll encounter none other than your former lead hobbit (Puck, Kenta, or Arty), and you'll have a lengthy reunion. 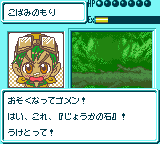 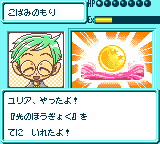 At the end of the week, you'll get an intermission from your lead hobbit regarding the Purification Stone. Send a hobbit to the Tree of Spirits (せいれいの木) in the Barrier Forest. They'll eventually encounter the Poisonweed monster. Once they defeat it, your former lead hobbit will appear with the Purification Stone, and you'll destroy the Poisonweed. Wait another week, and you'll receive the Jewel of Light (光のほうぎょく), as well as the Purification Stone. Hobbit Re-Recruitment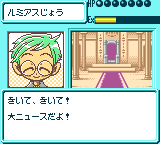 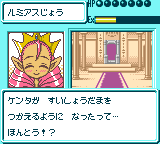 After you obtain the Jewel of Light, the fairy will note that it can fix the issue with the crystal balls that has forced hobbits to leave your party after two game years. Your lead hobbit will relay this information to the Queen. From this point forward, the two-year limit on hobbits is removed; at the end of a hobbit's tenure, you can choose to either keep them in your party or dismiss them as you please. You can also re-recruit dismissed hobbits from the "Previous" section of the Hobbit List, assuming you have an empty slot available (and the hobbit in question is not "out on a journey" – I'm not sure what causes this, but it may be that only one "old" hobbit is allowed at a time). It's also possible to rename hobbits now. 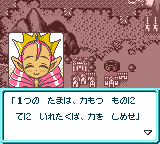  Wait a few weeks after finding the Jewel of Light. Eventually, the Queen will contact you about the next Jewels. These final two Jewels can be collected in any order. Jewel of Wisdom 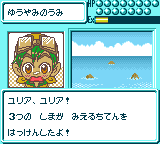 Repeatedly search the Morning Calm Port until you get several reports about a treasure being lost in the Twilight Sea near three islands. Search the Twilight Sea until you unlock the Sunken Ship (ちんぼつせん) option. 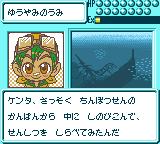 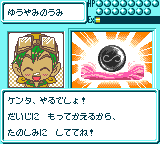 You'll now need a hobbit with at least an O-rank in the Swimming skill. Train a hobbit up with Swimming Practice at the Lake until they reach that level, then repeatedly use the Sunken Ship option until your hobbit finds the Jewel of Wisdom (ちえのほうぎょく). Jewel of Power 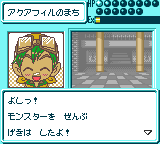 Once you get the Queen's message about the final two Jewels, a new area, the Trial Mansion (うでだめしのやかた), will be unlocked in Aquafil City. It consists of three consecutive battles against fairly tough opponents. 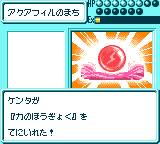 Defeating all the enemies will reward you with the Jewel of Power (力のほうぎょく). Endgame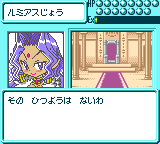 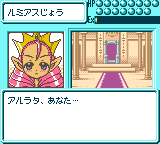 After obtaining the seventh Jewel, the Queen will ask you to send a hobbit to her chamber. A long cutscene will ensue during which you'll be forced to lose a battle against Alrata. Afterwards, your collected Jewels will be "stolen", not that this matters for gameplay purposes. 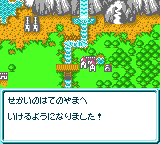 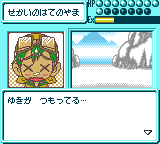 The World's End Mountains (せかいのはてのやま) will now be unlocked. Take the Cross-Mountain Route (やまごえのルート), which will consume several weeks and a lot of HP. Once a hobbit successfully makes the crossing, you'll unlock Pirika Village (ピリカのむら) in the northern part of the world map. 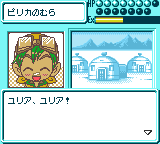 This begins what was supposed to be the final part of the game. Unfortunately, pretty much everything past this point was never finished and exists only as a bare skeleton – the final battle is all that's really in place. Most remaining areas are completely devoid of events beyond generic placeholder text the first time they're searched. 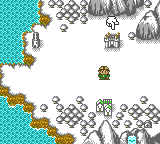 Repeatedly search Pirika Village. You'll unlock several areas, but the only one that matters is the Eternal Snowfield (とこふゆのせつげん). Search it until you unlock the Ice Castle (こおりのしろ), the final area of the game. 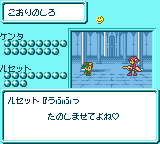  Search the Ice Castle. You'll face off against Recette, followed immediately by Seth, then Alrata. In order to defeat Alrata, the hobbit you send to fight her must have a sword equipped! The hobbit will use their sword to deflect her Energy Ball attacks back at her, hitting through her shield. If they're using a claw or other "fist" weapon, they won't do this, and Alrata will be completely invincible. 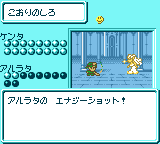 Note that if you lose to Alrata, you'll face her right away when you retry – you won't have to fight Recette or Seth again. 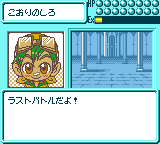 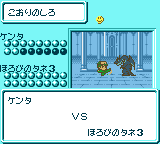 Once Alrata is defeated, the Decisive Battle (けっせん) option will be unlocked at the Ice Castle. Select it to start the final battle against the Seeds of Destruction (ほろびのタネ). You'll fight three consecutive bosses. 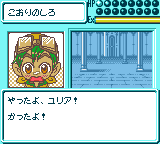  Once they're defeated, your hobbit gets a single line celebrating their victory, the credits roll, and... that's it. The ending wasn't finished.   After the ending message shows up, press A to reset the game. You'll notice you've unlocked a new "Bonus" (おまけ) option on the title screen. This is a simple sound test (with a message at the beginning explaining that it's a placeholder for the actual bonus content, which hadn't been created). Sidequests & Optional ThingsBlacksmith's Anvil & Crafting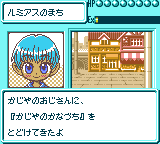 Have a hobbit search the Lake repeatedly until you unlock the Swimming Practice (およぎのれんしゅう) and Search Underwater (水中を たんさく) options. Send a hobbit to Swimming Practice repeatedly until they obtain the Swimming (およぎ) ability, then have them Search Underwater until they find the Blacksmith's Hammer (かじやのかなづち). Equip a hobbit with the Blacksmith's Hammer, then send them to search Lumious City. They'll return the Blacksmith's Hammer and receive the Blacksmith's Anvil (かじやのかなとこ) in exchange. At the end of the week, the Queen will mention this can be used for item crafting; the week after that, item crafting will be unlocked. 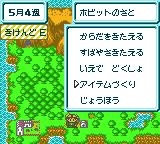 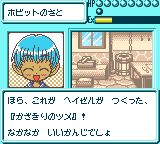 To craft items, equip the Blacksmith's Anvil to a hobbit and send them to the Hobbit Village for Item Making (アイテムづくり). They'll ask you what kind of weapon to craft and attempt to create something accordingly. The strength of the item produced depends on the hobbit's crafting skill. To get the best items, you'll need to have the same hobbit craft repeatedly. You can also attempt to craft without the Blacksmith's Anvil equipped, which will nearly always fail if your hobbit doesn't have at least an O-rank crafting level. If successful, they'll craft a shield instead of a weapon. Achieving a star rank in crafting takes a considerable amount of time – if you have your hobbit craft and nothing else, it'll still take most of their normal two-year tenure to do it. If you want to go for the top-tier items, wait until you have a freshly hired hobbit, or until the two-year limit is removed later in the plot. The ArenaAfter the Queen tells you the locations of the first four Legendary Jewels, searching Lumious Castle has a chance of yielding an unskippable event where the Queen asks to introduce the combat system. If you agree to it, you'll fight a guard as practice. You can also decline; the event will continue to be available at the castle as the Battle Challenge (バトルにちょうせん). Once you defeat the guard, you'll unlock the Arena. The Areana consists of four levels of increasing difficulty: C, B, A, and S. Ranks A-C can be challenged at any time. Rank S can only be challenged on the fourth week of every month, and the challenging hobbit must have already defeated Rank A. Arena combat consists of several preliminary rounds that are fought off-camera (your hobbit will get disqualified if they're too weak) and a final round that's an actual battle. You'll get 200 Cr for beating Rank C, but beyond that, the only rewards seem to be medals and experience. FishingSearching the Lake will unlock the Fishing (さかなつり) option. Fishing requires a rod. The Fishing Rod (つりがお) can either be bought at the store in Lumious City, or obtained from the Fishing Rod Tree (つりがお木) in the Windy Grasslands. To unlock the Fishing Rod Tree, try to go fishing without a Fishing Rod equipped; your hobbit will automatically ask if they should look for a rod. Fishing is primarily a source of money, as well as the Treasure Map (たからちず) item (which appears to be useless). Hobbits who fish a lot will gain/advance the Fishing skill. Dragon SlayingSearch the Northern Wilderness. You may need to have found the Skull Stone first. Eventually, your hobbit will report discovering a dragon's territory. This unlocks the Find a Dragon (ドラゴンをさがす) option. Selecting it will cause your hobbit to encounter a dragon, which you can order them to fight for experience (the default option is "run away"). Sometimes, you may also encounter a second dragon, Tiamat. Treasure HuntingAfter completing the steps to unlock the eastern world map, use the Find Silk option in the Windy Grasslands to unlock the Treasure Hunt option (たからさがし). Hunting for treasure yields various types of equipment. Hobbits who do this a lot will gain/advance the Treasure Hunter skill, which (probably) increases the chance of getting rare items. Thief's TowerAfter acquiring the Amulet of Wind from the Warrior's Tower, sending a hobbit to the Warrior's Tower again will unlock the Thief's Tower (とうぞくのとう). Hobbits sent there will attempt to climb the tower. There are 25 floors in total; your hobbit must be able to climb them all in two weeks, or they'll automatically turn back. Your hobbit will ask you about a tightrope on the 10th floor; low-level(?) hobbits will usually fail there and give up. If a hobbit actually makes it to the top floor, they'll report finding a pedestal with four indentations on it, and will attempt to insert the items they're carrying in it. Unfortunately, I have no idea what the game wants you to use, or if the events past this point were even implemented. Unfinished ContentSeveral areas and sidequests are unfinished and dead-end at various stages of completion.
Game CreditsLines marked with ※ are enclosed by 右 on the left and 左 on the right (not a typo) in the original text, and indicate affiliation with an external company.
|
| ||||||||||||||||||||||||||||||||||||||||||||||||||||||||||||||||||||||||||||||||||||||||||||||||||||||||||||||||||||||||||||||||||||||||||||||||||||||||||||||||||||||||||||||||||||||||||||||||||||||||