Official Guidebook

This is a partial translation of the Community Pom Official Guidebook, consisting of excerpts of the most useful and interesting content (explanations of game mechanics, developer interviews, etc.). Think of it as a manual, but more detailed. And with helpful editor's notes marking bogus info, because what's a strategy guide without some wild inaccuracies?
If you're going to play the game, we beg of you: at least read the Actions section first to learn the controls! Some of the things you can do aren't immediately obvious, but are required in later parts of the game. Of course, since this is a strategy guide, there are also spoilers if you read far enough in, so you might want to hold off on the rest until you're finished (or need the help).
While we'd have liked to translate the whole guide, the bulk of it consists of a lengthy game walkthrough that's neither necessary to play nor terribly entertaining to read, and we decided it wouldn't be a very good use of anyone's time. But feel free to look at the raw scans of the full book if you're interested!
Scans by Xanathis; translation by TheMajinZenki; web formatting by Supper.
Last revision: Saturday, 02-Oct-21 00:48:12 UTC
Contents
- Story (pp. 4–5)
- Character Introduction (pp. 6–7)
- Actions (pp. 8–10)
- Facility Guide (pp. 11–12)
- Pom List (pp. 76–79)
- Secrets of the Poms (pp. 80–81)
- Special Ability List (pp. 82–83)
- How to Make Your Community (pp. 84–89, 95)
- Trading Card List (p. 96)
- Spell List (pp. 98–99)
- Staff Interview (pp. 118–121)
- Setting Materials (pp. 122–127)
Story
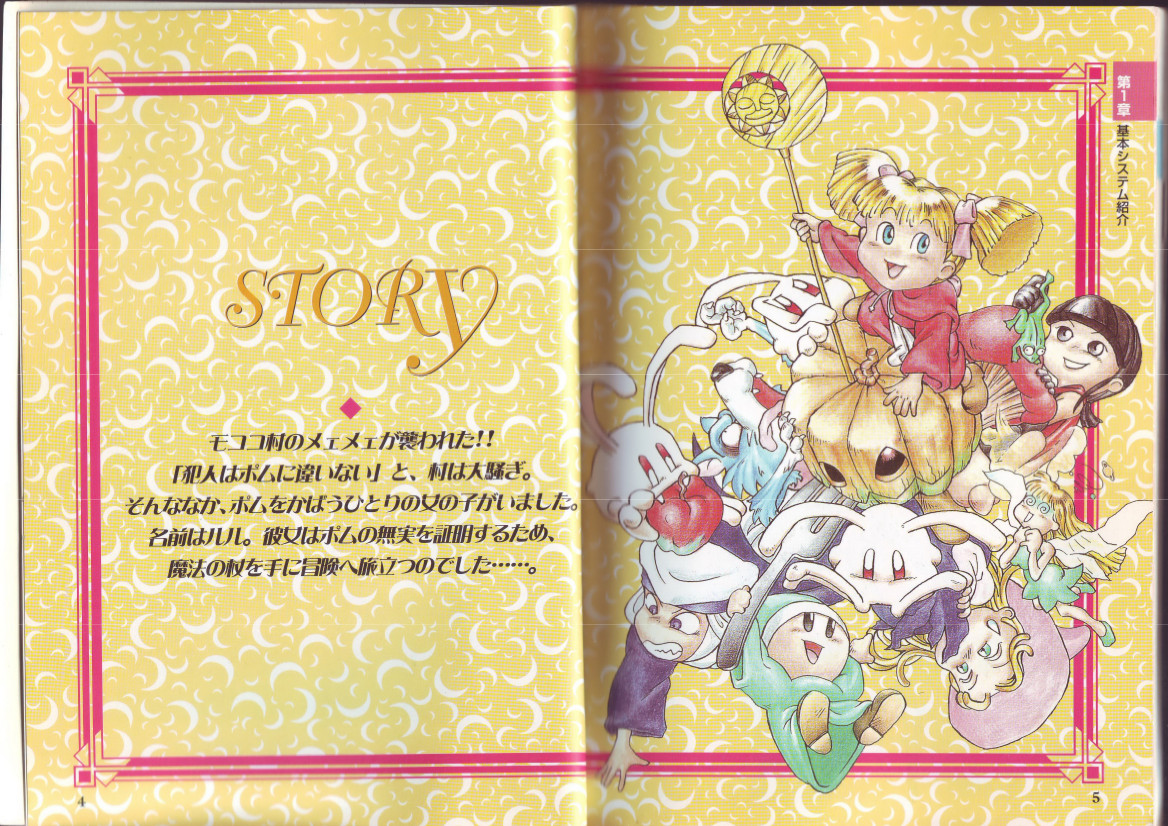
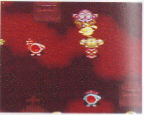
The Meymeys of Woolly Village have been attacked!
The village is in an uproar, claiming the Poms were behind it.
But among them is a girl who wants to protect the Poms.
Her name is Lulu. And so, she sets off on an adventure
with her magic staff to prove the Poms' innocence...
Character Introduction
There are many unique characters in "Community Pom." In this section, we will focus on some of the key individuals. As you progress through the game, you will meet even more unique characters.
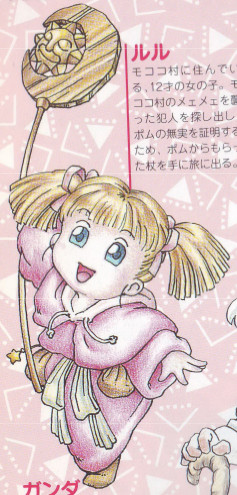
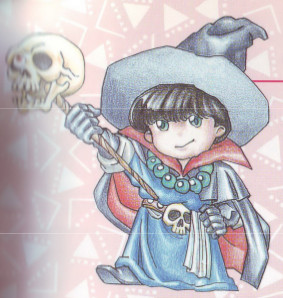
Lulu
A 12-year-old girl from Woolly Village. In order to find the real culprit behind the Meymey attacks and prove the Poms' innocence, she sets out on a journey, wielding the magic staff she was gifted by the Poms.
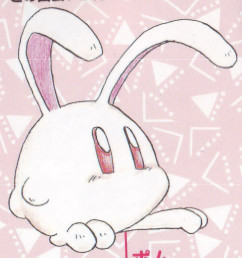
Poms
The mysterious creatures Lulu is searching for. There are 16 of them in total in the world, each one of them with their own special ability. They can communicate with humans.
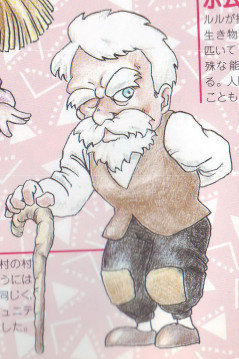
Ganda
Lulu's grandfather, and the chief of Woolly Village. Though he's without a doubt a great man, Lulu claims he's a "pseudo-intellectual." He advises his granddaughter on how to properly create the Community.
Sivil
A wizard with ambitions of world domination. He and the Majocal Sisters are constantly up to nefarious schemes, which are always thwarted by Lulu. His trusty partner is a one-eyed skull on a staff.
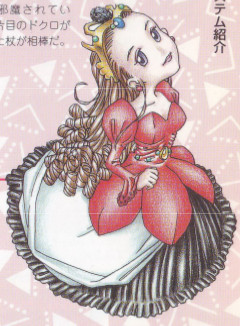
Cruela
The princess of Cruela, the largest city on the continent. She is very rich, and possesses treasures from all over the world. She has quite the overbearing personality.
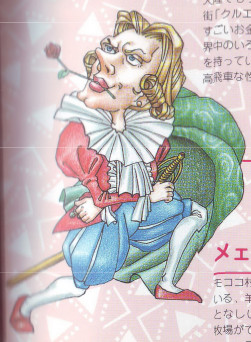
Pierre
The prince of Splashire. He is quite flamboyant. He constantly displays his affection for Princess Cruela by showering her with gifts, but she is yet to give him the time of day.
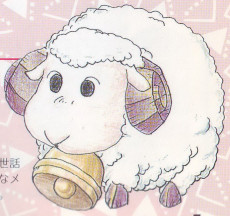
Meymeys
Docile creatures resembling sheep, reared in Woolly Village. They can be raised at your Community once you build a ranch. As long as you give them love and care, you will be able to raise the finest Meymeys in the land.
Actions
Lulu's actions are very simple to perform. As long as you master them, you'll be ready to take on any monster.

Let's master the basics!
Lulu can perform 11 different actions. These actions range from walking through the fields and dungeons to attacking with her staff, dashing, and launching critical strikes. These actions are not only useful in combat, but also during exploration. Mastering these controls will make your adventure that much easier.
Here are some tips on how to perform these actions. We hope that you'll master them and enjoy the game in full.
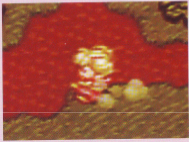
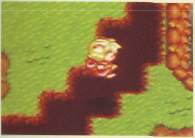
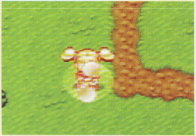
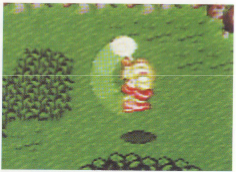
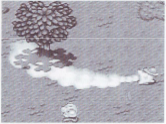
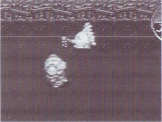
Lulu raises clouds of dust as she runs. The poor Poms have a hard time keeping up! Going fast is nice, but be careful: you can't stop on a dime!
Action 1
DASH
Press the D-Pad twice in the same direction. This is the action you will use the most.
Dashing is, of course, much faster than simply walking. However, you can't stop or change direction on a dime. In other words, if you dash in an area full of enemies, you could easily take a lot of damage. It's best used in a wide-open area.
You'll perform a powerful Dash Attack if you attack while dashing. It's definitely strong, but it leaves you open to enemy strikes. Watch the situation carefully before going for it.
Action 2
DASH ATTACK
While dashing, press the □ Button to perform a Dash Attack. A Dash Attack deals more damage than a basic attack. However, you will briefly stop in your tracks after the attack. If you use it in a place with a lot of enemies or during a boss battle, you're likely to take a hit.
With that said, it will become one of your best weapons when used right.
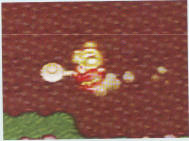
Critical Strikes can be launched immediately after defending, so they're very useful when fighting many monsters at once. You'll easily one-shot a lot of enemies!
Action 3
CRITICAL STRIKE
Hold the □ Button for a certain amount of time and let go to perform a Critical Strike. This is safer to use than the Dash Attack, so you might find it easier to perform. Holding the □ Button lets you defend, so you'll be relatively safe from enemy attacks.
In addition, using a Critical Strike on a Pom while dispersed will activate its special ability.
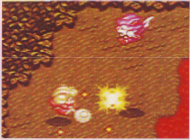
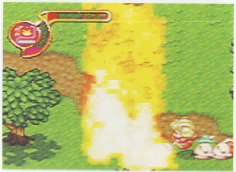
Magic can easily defeat monsters. At first you won't have any Grimoires, so you should find one as soon as possible!
Action 4
MAGIC
Press the 〇 Button to fill the bar in the upper-left corner of the screen, and you'll be able to use Magic. The bar decreases every time you use Magic, so you'll have to fill it again once it's empty.
There are two types of Magic: those that can be used a number of times, and those that will launch once the bar is full.
Keep in mind you can only use Magic when you have the required Grimoire equipped.
Action 5
JUMP
One of the most basic actions. Press the × Button to jump.
The longer you hold the button, the longer you'll stay up in the air. Sometimes you may want to release the button earlier to land on a platform. (Editor's note: This is an error in the original guide. The jump height is fixed and cannot be controlled.)
By the way, you can use the D-Pad to change direction while jumping!
Action 6
DEFEND
Hold down the □ Button to rotate your staff and enter a defensive stance. This is very effective against monsters who fire projectiles.
Releasing the button will immediately launch a Critical Strike. This might be obvious, but Lulu will only defend in the direction she's facing!
Action 7
WHISTLE
Press the R1 Button and Lulu will blow her whistle. This allows you to disperse and assemble Poms.
Since Poms can only use their special abilities while they're dispersed, you'll be whistling quite often.
Action 8
LIFT POMS
After dispersing your Poms, press the △ Button while touching a Pom to lift it. Press the △ Button again to throw it.
Some Poms have special abilities that will only activate when they are thrown!

Tips and Tricks
● Use your Dash Attacks well
As you now know, Dash Attacks are strong, but leave you open to counterattacks. Missing a Dash Attack can be very dangerous...
So here's a trick: try jumping while dashing, and then attack while jumping. This way, you'll be able to deal a lot of damage while also retaining your ability to move. Once you learn the timing to jump after a short dash, fighting will become that much easier.
● The mystery of Critical Magic
Magic can also be used in a different way, called "Critical Magic." Critical Magic can only be used while the Magic Bar is charged and the health bar is blinking.
If you meet the requirements, hold down the 〇 Button. Light will gather around Lulu, and she'll be able to launch a very powerful attack spell! However, since you can't move while holding down the button, it's very easy to get hit.
Launching Critical Magic can make a battle very easy, but you may have a hard time finding the right timing to do so.
Facility Guide
There are various facilities Lulu will find in the towns and villages she'll visit during her adventure. They're all very useful in their own way. Once you know what they do, you'll have a better time on your journey.

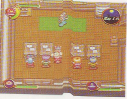
The three facilities available in every town
There are five towns and villages in the continent of Cruela. Each one of them has three common facilities: the Item Shop, the Clinic, and the Church. These are the most important facilities Lulu will need during her adventure.
There are also special facilities you can only find in certain locations, such as a Blacksmith, Fortune-Tellers, and Taverns. When you arrive in a new town, you should first check out what kind of facilities are there.
Guide 1
ITEM SHOP
● Selling a variety of useful items
Item Shops sell a variety of items you'll need during your journey. Each town sells different items, so you should keep track of where to find the items you need. You can also sell some of your items.
Guide 2
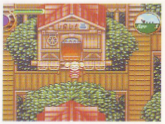
CLINIC
● Free check-ups, and save function
If Lulu is ever hurt during her adventure, the Clinic will treat her. Treatment is free, so there is simply no reason not to take advantage of this service. Furthermore, the nurse will save the game for you, making the Clinic one of the most important stops in any town.
Guide 3
CHURCH
● Recovering from poison and fainting
The Church will treat any poisoning and fainting. Unlike the Clinic, Churches demand a fee for this service. The fee is always 10% of the money Lulu is carrying. The richer you are, the more you are charged... (Editor's note: The fee charged is actually 1% of Lulu's money, not 10%.)
There are other facilities too
Guide 4
BLACKSMITH
You'll find this in the Dwarven Village. The blacksmith will challenge you to play "Gold Mining." If you win, he'll enhance your magic staff. You can keep challenging him to win 300 macarons.
Guide 5
FORTUNE-TELLING
You'll find these in the city of Cruela and the town of Burnhot. When you enter the store, the fortune teller will give you a hint on how to progress your adventure. It's completely free, so there's no harm in stopping by.
Guide 6
SCHOOL
You'll find this in the city of Cruela. Most of the students are diligent, but some of them not so much... There's no special event to be triggered at the School, but we recommend dropping by at least once.
Guide 7
PUB
You'll find these in the city of Splashire and the town of Burnhot. Lulu is too young to drink alcohol, but she can still gather information from the drunk patrons. However, they'll keep repeating the same stories.
Pom List
There are a total of 16 Poms for Lulu to find in the Cruela Continent.
Every Pom has its own special ability. You will often require their abilities to progress, so let's see what they can do.
| Laya | |||||||||||||
 |
Class | Layabout |
|
||||||||||
| Item | Red Ribbons | ||||||||||||
| Skill | None | ||||||||||||
| Location | Strange Mushroom | ||||||||||||
| The first Pom that will join Lulu. It wears red ribbons. It doesn't have any special ability, so you'll probably never bring it outside the Community. | |||||||||||||
| Hamma | |||||||||||||
 |
Class | Carpenter |
|
||||||||||
| Item | Turban | ||||||||||||
| Skill | Kawldbref | ||||||||||||
| Location | Fluffy Underground Maze | ||||||||||||
| The true form of the Moom that was attacking the Meymeys. Luckily, Lulu was able to turn it back to a Pom. Its "Kawldbref" skill allows it to breathe ice all around. | |||||||||||||
| Peep | |||||||||||||
 |
Class | Shepherd |
|
||||||||||
| Item | Hiking Hat | ||||||||||||
| Skill | Phyrebref | ||||||||||||
| Location | Fantastic Cave | ||||||||||||
| A lost Pom that Lulu found. Its "Phyrebref" is a powerful fire attack. By bringing Peep back to the Community, you'll be able to make a ranch. | |||||||||||||
| McDawn | |||||||||||||
 |
Class | Farmer |
|
||||||||||
| Item | Straw Hat | ||||||||||||
| Skill | Phyrebref | ||||||||||||
| Location | Wonder Tower | ||||||||||||
| A Pom that the Majocal Sisters locked inside a cell in the Wonder Tower. By bringing McDawn back to the Community, you'll be able to make a Field. | |||||||||||||
| Arren | |||||||||||||
 |
Class | Nurse |
|
||||||||||
| Item | Electronic Thermometer | ||||||||||||
| Skill | Weendbref | ||||||||||||
| Location | Splashy Lake Cave | ||||||||||||
| A Pom that lived with the Meymeys inside the Splashy Lake Cave. The "Nurse" and "Doctor" Poms can change class once they raise their IQ to a certain level. | |||||||||||||
| Emdee | |||||||||||||
 |
Class | Doctor |
|
||||||||||
| Item | Syringe | ||||||||||||
| Skill | Weendbref | ||||||||||||
| Location | City of Splashire | ||||||||||||
| The original owner of this Pom will give it to you in exchange for a "GoldHippo" autograph. By bringing Emdee back to the Community, you'll be able to build a Clinic. | |||||||||||||
| Buhl | |||||||||||||
 |
Class | Warrior |
|
||||||||||
| Item | Helmet | ||||||||||||
| Skill | Hedbat | ||||||||||||
| Location | Splashy Lake Cool House | ||||||||||||
| A Pom that was freezing inside the Splashy Lake Cool House. Its "Hedbat" skill allows it to flatten the wooden posts blocking your way. | |||||||||||||
| Rouge | |||||||||||||
 |
Class | Red Pom |
|
||||||||||
| Item | Hibiscus | ||||||||||||
| Skill | Sweemeeng | ||||||||||||
| Location | Secret Underground Graveyard | ||||||||||||
| A mutant Pom with a red body, found at the far end of the Secret Underground Graveyard. Rouge is the only Pom who can use the special ability "Sweemeeng." | |||||||||||||
| Shuri | |||||||||||||
 |
Class | Ninja |
|
||||||||||
| Item | Katana | ||||||||||||
| Skill | Straycheetong | ||||||||||||
| Location | Haunted Mansion | ||||||||||||
| A Pom that Sivil held captive inside the Haunted Mansion. Its skill, "Tangbreej," will be very useful in the second half of the game. | |||||||||||||
| Wheep | |||||||||||||
 |
Class | Adventurer |
|
||||||||||
| Item | Cowboy Hat | ||||||||||||
| Skill | Hedbat | ||||||||||||
| Location | Wobbly Ruins Museum | ||||||||||||
| A Pom found inside the Wobbly Ruins Museum that can use "Hedbat." It will reveal important information about the Moon. | |||||||||||||
| Ken | |||||||||||||
 |
Class | Samurai |
|
||||||||||
| Item | Standard | ||||||||||||
| Skill | Tangbreej | ||||||||||||
| Location | Maharaja's House in Burnhot Town | ||||||||||||
| A Pom that lives with Maharaja in Burnhot Town. Maharaja will give it to you as a reward if you fulfill his request. Ken's reaction when it finds out is somewhat sad. | |||||||||||||
| Rio | |||||||||||||
 |
Class | Reverend |
|
||||||||||
| Item | Reverend Hat | ||||||||||||
| Skill | Barrya | ||||||||||||
| Location | In the Northwest of Cruela Continent | ||||||||||||
| A Pom you will meet deep inside the forest in the northwest of Cruela Continent. By having a "Reverend" or a "Nun," you'll be able to build a Church. It can change its class to "King." | |||||||||||||
| Giallo | |||||||||||||
 |
Class | Yellow Pom |
|
||||||||||
| Item | Witch Hat | ||||||||||||
| Skill | Leitneeng | ||||||||||||
| Location | Scorching Desert Cave | ||||||||||||
| A mutant Pom with a yellow body, found at the far end of the Scorching Desert Cave. It can use the powerful offensive skill "Leitneeng." | |||||||||||||
| Nailo | |||||||||||||
 |
Class | Builder |
|
||||||||||
| Item | Safety Helmet | ||||||||||||
| Skill | Kawldbref | ||||||||||||
| Location | Holey Tower | ||||||||||||
| A Pom you will meet inside the Holey Tower. It wears a safety helmet like any builder worth their name. Its stats are balanced, so it can be used for any kind of job. | |||||||||||||
| Blau | |||||||||||||
 |
Class | Blue Pom |
|
||||||||||
| Item | School Cap | ||||||||||||
| Skill | Phastravvelle | ||||||||||||
| Location | Purring Clock Tower | ||||||||||||
| A mutant Pom with a blue body, found inside the Purring Clock Tower. Blau is the only Pom who can use the special ability "Phastravvelle." | |||||||||||||
| Rosa | |||||||||||||
 |
Class | Nun |
|
||||||||||
| Item | Veil | ||||||||||||
| Skill | Barrya | ||||||||||||
| Location | Purring Clock Tower | ||||||||||||
| A Pom you will meet inside the Clock Tower. This is most likely the last Pom you will find. | |||||||||||||
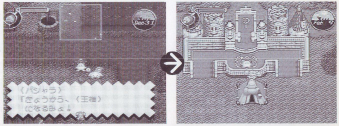
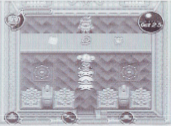
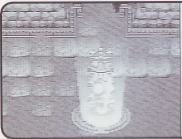
◆ The Poms come from the Moon... ◆
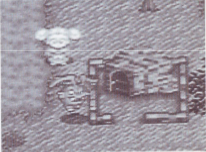
On the other side of the Rainbow Bridge is the Moon world. This is actually where the Poms come from. This town is called Lunaire, ruled by King Pom. The facilities here are the same you'd find in Lulu's world: an Item Shop, a Clinic, a Church, etc.
If you go outside, you can see Lulu's world, the "Arth," in the distance. And on the outskirts of the town, Castle Vajra looms over... The Poms from your Community originally came from here. Will they have to return one day?
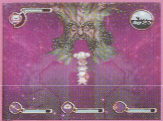
You can use the old tree at the south of "Arth" to get here.
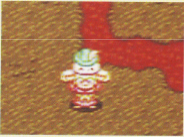
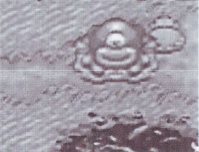
This is the home of King Pom. He sure looks important wearing that crown!
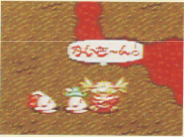
Lunaire, the town of Poms. There are many Poms living here, as well as various facilities.

Secrets of the Poms
The Poms are creatures shrouded in mystery. But once you start understanding their secrets, you'll be able to use their abilities more effectively. Let's shed some light on some of their secrets!
● Let's bring different Poms around ●
If you're facing a lot of monsters, bring powerful Poms with you.
They'll defeat your enemies in no time. They're so reliable.
Focusing on power to crush any monster
There are monsters that Lulu can't hurt, but Poms will make short work of. If you want to defeat monsters easily, you should bring the powerful Buhl or the mutant Rouge. But be careful: a Pom's karma will increase every time it kills a monster. If its karma increases too much, it'll turn into a Moom.
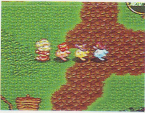
These Poms can lead you anywhere on the Cruela Continent.
You can get to treasures you could never reach before.
Focusing on mobility to clear any area
During your travels, you'll find many places that can only be reached if you use the special abilities of certain Poms. To reach those areas, you'll need to bring the Poms who can use the abilities "Hedbat," "Sweemeeng," and "Tangbreej." This way, you'll never miss out on any treasure chest!
Bring the three colored Poms, and...
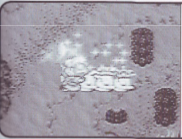
Every attack is a critical strike! Those monsters won't know what hit them!
Bring the Red, Yellow, and Blue Poms together, and...
Mutant Poms are colored differently from other Poms. They have higher stats and can use special abilities unique to them. Furthermore, if you bring all three of them with you, all of their attacks will become critical strikes. It won't be easy finding all three, but once you do, you'll see how strong they are!
● What is a Class Change? ●
When a Pom is ready to change class, they'll let you know. This is definitely worth the time and effort you've invested.
When certain Poms raise their IQ and Luck to a certain level, they'll be able to change their class. There are four classes that can be changed: "Doctor" and "Nurse" can become "Scholar," while "Reverend" and "Nun" can become "King."
By changing class, you'll be able to build a "Library" and a "Castle," which would otherwise be unavailable, in your Community. Once these buildings have been created, you will trigger new events that will increase your Poms' stats.
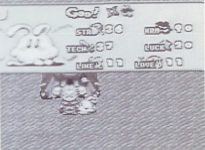
To change class, you simply have to meet the requirements.
Once its IQ is high enough, the Pom will become a Scholar. Even the graphics will change to reflect that. Look at it. The Pom is now a great scholar.
Once you have a Scholar, you'll be able to build a Library. Inside the Library there are many books written by the Poms themselves(?).
From "Doctor"/"Nurse" to "Scholar"
The "Doctor" and "Nurse" Poms can become "Scholars."
To trigger the change, you need to raise their IQ to 80 or more. This class change is relatively easy to achieve, as your Poms can increase their IQ by studying.
Once you have a "Scholar," you'll be able to build a Library in your Community. The Library will let you enter the hidden stage "Fantasy Land" (Adventure 8). In "Fantasy Land," you'll be able to find the last missing Poms and the final Grimoires.
Luck can only be increased with Luckamins. If you want to have a King, you'll have to use them carefully, or you won't have enough to do so.
You need a King to build a Castle. Once you have a Castle, your Poms will stop gaining Karma. The music will change as well!
From "Reverend"/"Nun" to "King"
The "Reverend" and "Nun" Poms can become "Kings."
To trigger the change, you need to raise their IQ to 80 or more, as well as their Luck to 20 or more. You can raise their IQ the same way you'd do it for a Scholar. Luck is a different matter, however. The only way to raise that is to use the stat-raising item Luckamin. Make sure you have enough to change your Poms to King.
Once you have a King, you'll be able to build a Castle in your Community. The Castle will keep the Karma of Poms in the Community from increasing.
Special Ability List
There are a total of 9 different abilities your Poms can use. Each one of them is unique in its own way. They all have their uses depending on the situation. Learn their quirks and nothing will stop you!
Powerful flames that will burn all monsters away. Pay attention to where the Pom is facing.
Offensive
Phyrebref
This ability can be used by Peep and McDawn.
The Pom will breathe fire from its mouth and burn the monsters to cinders. It's also effective against bosses. To activate it, strike the Pom's head with your staff.
The ice breath covers the entire area. Use it when you're surrounded by monsters.
Offensive
Kawldbref
This ability can be used by Hamma and Nailo.
The Pom will breathe ice in a circle, freezing all monsters in the vicinity. This is very useful when you're surrounded. To activate it, strike the Pom's head with your staff.

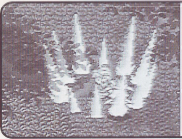
This giant thunderbolt will paralyze monsters. They're easy to hit with your staff when they can't move!
Offensive
Leitneeng
This ability can only be used by Giallo.
A giant thunderbolt will strike the ground, immobilizing all monsters. Like "Kawldbref," it is useful for when you're surrounded. To activate it, strike the Pom's head with your staff.
Those nasty posts will no longer stop you. You'll be able to reach places you never could before.
Mobility
Hedbat
This ability can be used by Buhl and Wheep.
Lift the Pom, and throw it at a wooden post sticking out of the ground. The Pom will hit it with its head, flattening the post and allowing you to move on. This useful ability will let you get to previously-unreachable treasure chests, as well as open up shortcuts.
Hit the Pom's head and it'll stretch its tongue. Now you have a bridge you can cross!
Mobility
Tangbreej
This ability can be used by Shuri and Ken.
By stretching its tongue and twisting it around a post, the Pom will create a bridge you can cross. To activate it, strike the Pom's head with your staff; however, it won't work if the Pom isn't facing a post.
You can go anywhere the water reaches. If you see a pier, go for a swim!
Mobility
Sweemeeng
This ability can only be used by Rouge.
You can ride a Pom from a pier to move across water. To activate it, throw the Pom into the water from a pier. If you have the Lovely Swimsuit in your inventory, Lulu will wear it while you use this ability.

If you're far away from town, use this ability to warp back instantly. It sure saves a lot of time!
Mobility
Phastravvelle
This ability can only be used by Blau.
This allows you to instantly return to any town or dungeon you've visited before. To activate it, strike the Pom's head with your staff.
The Pom will protect Lulu with its own body. Now you can move through danger without worry!
Etc.
Barrya
This ability can be used by Rosa and Rio.
This will make the Pom spin around Lulu for a fixed amount of time, acting as a barrier. This is useful when you would rather avoid combat. To activate it, strike the Pom's head with your staff.
Poms can breathe so hard that they move sailboats!
Etc.
Weendbref
This ability can be used by Arren and Emdee.
The Pom will blow powerful wind that will make monsters spin and stop moving for a while. It can also be used to blow whistles, clear piles of dead leaves, or move sailboats. To activate it, strike the Pom's head with your staff.
How to Make Your Community
Once you find your first Poms, you can start to create a Community. In this section, we'll provide some tips on how to do so.
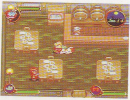
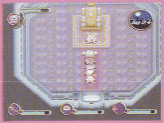
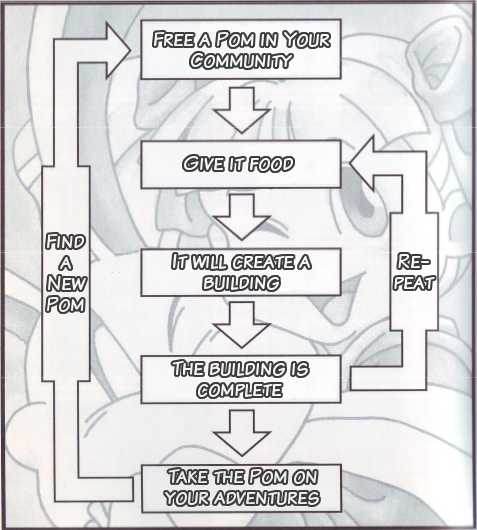
● Community Build Flow ●

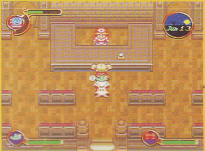
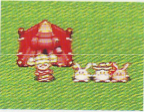
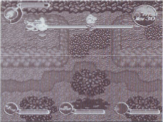
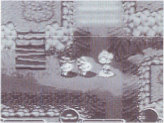
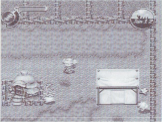
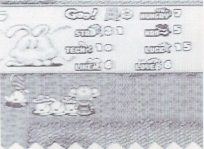
This will become the Community where the Poms will live. What kind of place will you create?
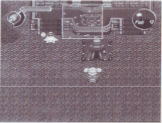
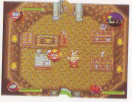
The number of Poms has increased, and the Community is developing. Let's keep creating more and more buildings.
Let's create a Community
When you return to the village with your first Pom, Ganda will give Lulu lands of her own. This land will become the Community where the Poms you find will live. How much the Community will grow, and whether the Poms like it, depends on how much love you shower them with.
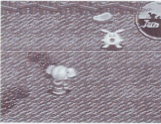
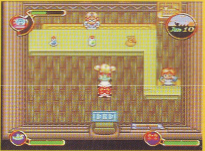
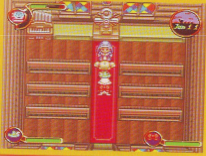
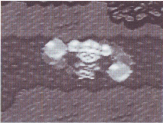
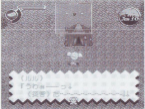
First, pick the treat you want to give the Pom, then press the 〇 Button. Lulu will then throw the treat towards the Pom.
After eating, the Pom will start doing something. Here, it's going to make a building.
First, let's give them treats
In order to get the Poms to do something, you must first feed them. To do so, face a Pom and press the 〇 Button. Depending on the type of treat you give them, Poms will perform different tasks a varying number of times.
If you do not feed them regularly, their Hunger level will rise until they eventually faint. For this reason, it is important to stock up on food items, as not to run out when you need them the most.
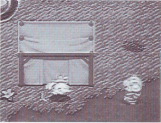
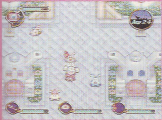
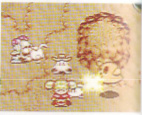
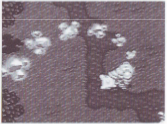
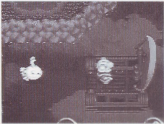
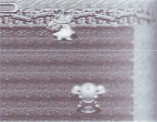
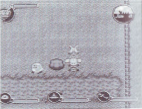
Once they find a good place to start building, they will place a white tent. Aren't Poms just adorable, wielding their pickaxes?
The building is complete. In this case, the Pom made a "Wooden House." Let's keep this up!
Creating buildings in the Community
The very first thing you should do in your Community is create buildings. If you give a Pom a treat, it will start working after filling its tummy. Make sure to confirm the treat you're giving them, as some food items are specific to working on the fields or at the ranch.
Also, you should keep an eye on the number of food items you have left. In the early stages of the game, you only have a limited amount of food. If you're running low, you should enter the nearby forest and kill monsters to replenish your supply.
● Things to watch out for in your Community ●
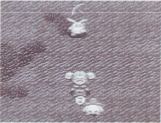
If the Pom does something different from what it should, check what nearby Poms are doing.
Ah-ha! It seems there was already a Pom performing this action. In this case, you should give it a different treat.
Keep track of what Poms are doing
Sometimes when you give a Pom a treat, it won't behave per the food item's description. If this happens, it means there is already a Pom doing the same thing, or that this specific action is at full capacity. In order not to waste any food items, you should check what your Poms are doing beforehand.
It takes a lot of time to create the fields, so you should start as soon as possible. You'll be able to begin right after you find McDawn.
It's finally done. Now you can start farming! The act of farming in and of itself takes a lot of time, so make sure your Poms are working on it often.
Let's make specific buildings as soon as possible
Creating the fields and the ranch will take a lot of time. There are some crops that are required for your quest that can only be grown in your field. If you start working on your fields only when you need that crop, you'll have to wait quite some time. You can start creating your fields and ranch relatively early, right after you find McDawn (for the fields) and Peep (for the ranch).
If you feed a sleeping Pom, it will wake up and start working. But it will only perform one action.
As soon as that action is over, it will fall asleep again. While it does lower Hunger and Karma, it's not efficient to give them treats during the night.
Give them treats when they're awake
(Editor's note: This section is severely mistaken. Feeding Poms at night actually makes them perform one action less than they normally would, e.g. 2 actions for a 3-action treat.)
While you can give Pom treats during the night, it is not recommended to do so. That's because Poms will only perform one single action at night. If you feed them during the day, they will perform their intended number of actions, even once night has fallen. Long story short, it's not efficient to force a sleeping Pom to work.

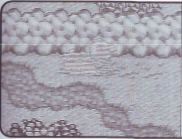
Farming takes a lot of time, from sowing seeds to sprinkling water. Work hard until your crops are ready for harvest!
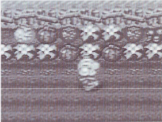
The crops have grown. You can see all the different fruits and veggies. It was hard work, but it was worth it.
Take your time with farming
Once the fields are ready, you can start farming. You can't simply leave the fields as they are, you know. Farming takes time, so once the fields are ready, you should appoint a Pom to work on them all the time.
You can increase the variety of crops you can grow by using "Fertilizer," so you should use it as soon as the Field is completed.
Your ranch is quite large. Let's get some Meymeys and raise them!
You can raise Meymeys by simply releasing them inside your ranch. Equip the Meymey and press the 〇 Button inside the fenced area.
Let's raise Meymeys
During your adventure, you'll find some lost Meymeys. Once you have a ranch in your Community, you'll be able to raise them. Like farming, raising Meymeys takes time. If you want to raise wonderful Meymeys, you'll have to appoint Poms to work on the ranch all the time.
Meymeys have different growth ranks. The higher their rank, the more beautiful they'll become, and the higher the price Dona Dona will buy them for.
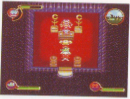
A newly-created building has low stats. It won't last long against a Dismonster like this.
Use reinforcing items to increase their stats. Now this building can withstand a Dismonster.
Pay attention to the buildings' stats
The buildings in your Community have stats regarding their durability and resistance to quakes, fires, and floods. The higher these stats, the more resistant the buildings will be to Dismonster attacks.
The stats of your buildings can be increased using special reinforcing items. These items are sold at Item Shops all over the land, so you should buy them and use them as often as possible. As long as you keep prepared, you'll have nothing to fear from Dismonsters.
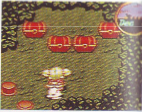
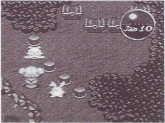
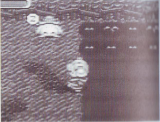
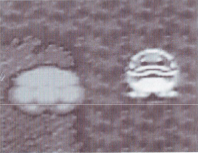
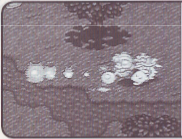
You'll realize Dismonsters are attacking because something feels off.
You must defeat the Dismonsters to protect your Community.
Oh no! It's a Dismonster!
When you return to the Community after completing an adventure, occasionally, you'll find that something feels off. That's the sign of a Dismonster attack.
Dismonsters will appear once every 15 days. They will move to different places in your Community for about 30 seconds, trying to destroy your buildings.
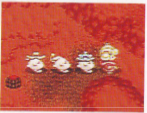
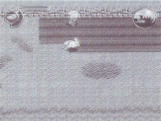
These are the Dismonsters
There are three types of Dismonsters, and they will appear randomly.
The three types have either a fire, water, or earth affinity. When a building is attacked, the damage it takes depends on its resistance to the Dismonster's elemental affinity.
The Dismonsters will only remain for about 30 seconds; if you're not careful, they will use this time to destroy your buildings. If you manage to find them quickly and attack them, you will be able to prevent any damage. Elemental magic can be very effective on them.
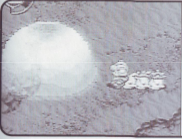
This is the fire-element Dismonster. The spell "Frawst" is particularly effective against it.
This is the water-element Dismonster. The spell "Phyre" is particularly effective against it.
This is the earth-element Dismonster. Since it moves underground, be ready to attack as soon as it emerges.
| Item | Effect |
|---|---|
| Sturdinator | Increases a building's Impact Resistance. |
| Dequaker | Increases a building's Quake Resistance. |
| Deflamer | Increases a building's Fire Resistance. |
| Derainer | Increases a building's Rain Resistance. |
Use items to counter Dismonsters
Once Dismonsters appear, they'll start wreaking havoc in your Community. While Lulu can take them down, due to their sheer numbers, you won't be able to defeat them all before they cause damage.
Your best countermeasure is to use reinforcing items to increase the stats of your buildings. These items are sold at every Item Shop, so you should buy them whenever you can. As long as the buildings' durability and resistances are high, you'll be fine when Dismonsters appear.
Keep an eye on the Karma value. Any higher than this and it'll be trouble.
How to keep a Pom from turning into a Moom
Poms can easily defeat monsters that get in your way. However, if you let Poms fight all of your battles, their Karma will keep increasing. Even outside of battle, their Karma will increase if you don't periodically feed your Poms in your Community.
Once this value reaches 100, Poms will transform into mean creatures called Mooms. Luckily, this is a rare occurrence. You simply have to refrain from letting Poms fight all your battles, and remember to give them treats in your Community. As long as you take good care of your Poms, they won't turn into Mooms.
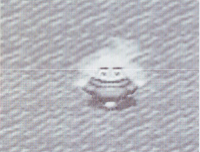
Your Pom turned into a Moom. You can't let it roam freely. Keep after it!
What to do if your Pom turns into a Moom
So, your Pom has turned into a Moom. What now?
When a Pom turns into a Moom, it'll fly around the Community, attempting to destroy your buildings. Unlike Dismonsters, you won't be fighting a large number of enemies, but Mooms are much more agile, so they won't be easy to catch. You have to time your attacks well if you want to minimize damage to your buildings.
Also, they cannot be defeated; they'll warp away after a certain amount of time. Keep chasing after them until they finally leave.
In a way, you could say that a Moom is the ultimate Dismonster.
How to remove a Pom's Karma
Giving a 2-action treat will reduce both Hunger and Karma. It should be more efficient than the multiple-action treats.
If Karma is too high, you can give your Pom a "Goodboy Pill" and keep those Mooms away.
(1) Give them a 2-action treat
When you give a Pom a treat, its Karma will decrease by its IQ value. As long as you keep feeding them regularly, you won't have to worry about Karma.
(2) Give them a "Goodboy Pill" to remove it all
If Karma is too high, you can remove it all at once by giving them a "Goodboy Pill." You can also use it on a Moom to deal a lot of damage.
◆ What's the right way to feed your Poms? ◆
Being aware of what your Poms are doing is also an important part of creating your Community.
1. Give them the right treat for the right situation
When feeding your Poms, you should always give them the right treat for the right situation. For example, there's no point in giving them a treat that makes them farm if your fields aren't ready yet. It's also important to be aware of the current status of your Community. In short, confirm what you have and what you need, and give Poms the right treat.
When you're low on food, go to the nearby forest, defeat monsters, and collect the food they drop.
2. Keep an eye on your food storage
As you find more and more Poms, you'll have less and less food in your storage. Be sure to pick up any food items monsters drop when defeated. Even your fields won't provide food at a fast enough pace, so you can't rely only on vegetables. If you're ever low on food, go to the nearby forest and kill monsters to replenish your supplies.
This amount of Hunger should be fine. Any more than this and it might be trouble. Be sure to feed them regularly.
3. Pay attention to the Poms' Hunger level!
When there's no work to do in your Community, you might think that you're wasting food when giving Poms treats. However, if you don't feed them regularly, their Hunger value will increase; if it rises too much, they will faint.
Keep an eye on their Hunger level. If it's too high, give them treats, even if they have nothing to do.
Trading Card List
At the Trader, items not sold in normal shops line the counter.
Let's collect the Trading Cards
The mysterious cards Lulu will discover along her journey are Trading Cards. In all, there are 42 cards throughout the world. Since they're hidden in various places, finding them all won't be easy. If you build the Trader in the Community, Tonerko will trade you valuable items for the cards you've collected.
| # | Card Title | Where to Get It |
|---|---|---|
| 1 | The Young Village Girl | Peter's house |
| 2 | Little Witch Cosplay | Splashire City |
| 3 | Grandpa the Writer | Pile of dead leaves |
| 4 | The Young Shepherd | Fluffy Forest |
| 5 | Good Siblings | Hot Mountains |
| 6 | Ol' Man | Splashy Lake Cave |
| 7 | Delicious Food | Splashy Lake Cool House |
| 8 | Majocal Sisters | Community Casino prize |
| 9 | The World Will Be Mine! | Whac-A-Moom prize |
| 10 | The Black Demon | Wonder Tower |
| 11 | Princely Reward | Received from king after rescuing Pierre |
| 12 | Call Me Princess! | River area around Cruela |
| 13 | The Cheerful Village | Splashy Lake Cool House |
| 14 | She's At That Age | Cruela City |
| 15 | Deep Knowledge | Cruela City |
| 16 | Growling Strings | Cruela City |
| 17 | The Servant | Splashire Castle |
| 18 | He's After One Thing | Cruela Castle |
| 19 | Free Pass | (Editor's note: Actually located in Cruela Castle) |
| 20 | I Love Shinies! ❤ | Easygoing Dwarven Village |
| 21 | Wind Deity | Easygoing Dwarven Village |
| 22 | Water Spirit | Haunted Mansion |
| 23 | Fire Genie | Scorching Desert |
| 24 | The Desert Messenger | Maharaja's house |
| 25 | The Flower Goddess | Wobbly Ruins |
| 26 | Store Coupon | Wonder Tower |
| 27 | Beta-Carotene | Wobbly Ruins Museum |
| 28 | The Hanged Man | Wobbly Ruins Museum |
| 29 | Moondragon | Scorching Desert Cave |
| 30 | King Pom | Holey Tower |
| 31 | King of Watermelons | Holey Tower |
| 32 | Magic Staff | Purring Clock Tower |
| 33 | Love Tambourine | Purring Clock Tower |
| 34 | Lunagic Ring | Splashire Castle |
| 35 | Love Love ❤ Lolita | Fantasy Land |
| 36 | Olive Necklace | Fantasy Land |
| 37 | Marriage Rut: Wife | Castle Vajra |
| 38 | Young Vajra | Castle Vajra |
| 39 | Marriage Rut: Husband | Castle Vajra |
| 40 | Cackleca, Age: 65,535 | Holey Tower |
| 41 | Prayer to the Moon | (Editor's note: Actually either located in Moonworld Lunaire or doesn't exist, depending on game version; see footnote) |
| 42 | Sexy Swimsuit | In the northwest of Cruela Continent |
Editor's note: Card 41 is actually unobtainable in the original 1997 release of the game due to its event trigger accidentally not being assigned to a clickspot. This went unnoticed during testing because Card 22 is bugged and awards two cards instead of one, so collecting the 41 cards that are actually available still results in receiving the intended total of 42 cards. When the game was rereleased in 1999, Card 41 was made available in the spot where it was seemingly meant to be all along, though the "doubled" Card 22 was not fixed, so that version awards 43 cards in total. All issues have been fixed for the translation patch.
Spell List
You can learn new spells by finding Legendary Grimoires inside treasure chests. "Phyre" and "Frawst" in particular are very useful, even outside of combat.

First, charge your Magic Bar
Lulu can only use her spells when the Magic Bar in the top left corner of the screen is full. Every time she uses a spell, the bar will decrease. If the Magic Bar is almost empty and you're entering an area full of monsters, you should empty it so that you can fully charge it again.
Phyre
Weird Tree
Hurls a fireball in front of Lulu. It can also press certain switches in dungeons.
Frawst
Strange Mushroom
Creates a wall of ice around Lulu. Very effective when surrounded by enemies. This spell makes Lulu invincible for a few moments.
Tellaypawt
Wonder Tower
Makes Lulu leave a dungeon and returns her to a town or a village. Very useful when in danger.
Heksplowsion
Splashy Lake Cool House
Explodes when it hits a wall or an enemy, dealing great damage to anything in range. Consumes a lot of magic.
Tranzparrant
Haunted Mansion
Turns you invisible for a fixed amount of time. Monsters won't be able to see you, but keep in mind that you're not invincible.
Heelieng
Wobbly Ruins Museum
Averages the party's HP. Very useful in the second half of the game, once enemy attacks get more intense.
Anteedaute
Purring Clock Tower
A spell that cures both poisoning and fainting. This will be very useful in the second half of the game. (Editor's note: This spell does not cure fainting, only poisoning.)

Thandar
Purring Clock Tower
The strongest spell. Thunder is released from your staff, inflicting great damage.
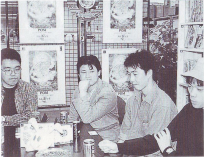
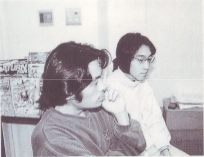
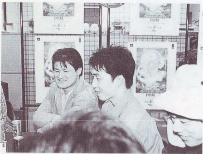
Staff Interview
"Community Pom": a game teeming with comical characters and diverse actions. Today, we asked the development staff to tell us the secret story behind its creation.

Mr. Hayasaka was in charge of planning. The game was born from his head.

Mr. Higashida created all those cute characters with his right hand.

Mr. Ogura, the creator of "GoldHippo."

Hawron was modeled after Mr. Horiguchi.

Mr. Sekihara was in charge of programming.

Mr. Sekikawa was in charge of the Community Mode.

Mr. Ishikawa was in charge of the minigames.

Mr. Takazawa gave us his view from the standpoint of PR.

Mr. Konya, their producer, who looked after the development staff.
Mr. Hayasaka told us about the concept of the game.
—Thank you very much for joining us today. Without further ado, why don't you tell us about the origin of the game?
Hayasaka: About 3 years ago, I had the idea that it would be fun to combine an action game with a raising game. During that time, a game called "The Horde" had been released overseas; it was about raising cows, and occasionally your farm would be attacked and you would have to defend it. I was thinking it might be a good idea to base a game on a similar concept but in a more lighthearted fashion.
Konya: In the early stages, I wasn't convinced about combining action and raising; the cute characters, however, seemed to tie everything together perfectly.
Takazawa: With video games becoming more popular, the number of players enjoying more than one specific genre has increased.
—Not to mention, raising games have become somewhat popular recently.
Konya: That's true. There's a surprising variety of raising games on the market.
—"Community Pom" is the first game you've developed and released in-house. What are your thoughts about this?
Konya: After the proposal, we decided to work on the project independently due to its high potential. However, only those who were directly involved in the actual development can understand the difficulties of turning a project into reality.
Mr. Konya and Mr. Takazawa gave us a different perspective about the game from the development staff.
—How was it for you?
Hayasaka: Good question. I've known the members of this team for a long time, but we'd never produced an entire project on our own. I figured this would be a good test of our skills.
Higashida: We actually didn't settle on Lulu's face until the last minute. And during development, Poms bore a heavy resemblance to characters made by other companies (laughs).
Konya: I always kept my opinions to myself. Producers meddling with development can often lead to disaster. I didn't want sales to alter the original vision of the development staff.
Hayasaka: Even so, some things were just not possible to realize.
—Could you tell us about some of the difficulties you encountered during development?
Hayasaka: In the early development stages, the RPG portion was very orthodox. It was actually Sekihara's fixation with action games that led us to the current iteration of the gameplay. We were inspired by certain other games, but we've managed to create our own take on the genre.
Sekihara: It wasn't easy to settle on the specifics of Community Mode. You can't just have action segments and raising segments, they have to be tied together somehow; I think that was the most difficult part of the project.
Hayasaka: Sekikawa, who was in charge of the Community part, actually worked from home most of the time, so it was hard to get in touch with him.
Sekikawa: Yes, that's true. We had so little contact that at times I didn't even know if the project was still in progress (laughs).
Higashida: For me, the most difficult part was having to learn how to work with a new console. This was our first PlayStation game, and something that seemed obvious to us would end up not being so at all. We'd often have to stop and figure out how to deal with it.
Hayasaka: In terms of work volume, we simply didn't have enough manpower. On the other hand, I feel like things wouldn't have gone this well if we did have more people.
It was a lively interview from start to finish.
—In other words, you had some difficulties caused by the limited number of people on your team, but at the same time it was because of that small number that you achieved what you did.
Sekihara: I'd say our biggest struggles were making the game easy to play, as well as reducing loading times as much as possible. Those were my two main concerns; I'd say my troubles came half from the difficulty of doing so, and half from my personal obsession.
—Is there something specific about this game you'd like players to see?
Hayasaka: It's hard to pick something in particular. I'd like them to see everything the game has to offer.
Higashida: I'd like players to check out the art for the great magic spells and the summoning magic.
Horiguchi: There's a boss in Adventure 2 called "Hawron" (see page 23). I'd like players to check him out. He's modeled after me, you see (laughs).
Ogura: I'd like them to see GoldHippo dance.
Sekihara: Since I only know what was written in magazines, sometimes I tell myself "I sure hope the game's fun" (laughs).
Ishikawa: I'm in the same boat. I basically only know about the parts I've worked on.
Takazawa: I just hope the players take their time to enjoy the game.
Konya: Same here. Let the players enjoy the game.

They seemed to be deeply moved as they looked back on the development.
—There are a lot of goofy characters in the game. How did you come up with them?
Hayasaka: Generally speaking, we first came up with a name that rolls off the tongue and fits the world we created. We would then base the character on that name.
Higashida: We did that for the common NPCs. For monsters, however, we started from their design, and gave them a fitting name later.
Hayasaka: The base concept was to create surreal, comical characters that wouldn't be out of place in "Alice in Wonderland."
—What about the game's titular characters, the Poms?
Sekihara: At first, all Poms looked the same. At some point we realized that you couldn't tell them apart, so we gave them accessories.
Hayasaka: Right. They didn't have those in the original art, so they were all identical.
Sekihara: After we decided to have them wear accessories, we had to deal with a new problem: the Poms had to move while wearing them!
Konya: Looking back, this game's development was like climbing a mountain. No matter how long we climbed, we could never see the top (laughs).

Mr. Sekihara's team displayed their dedication as programmers.
—Why don't you tell us about your favorite characters?
Hayasaka: I'd say "Cackleca."
Higashida: I'm going to pick "Prince Pierre" of Jabasky. It's a shame he doesn't end up appearing a lot in the story.
Ogura: I'm going to pick "Golden Desert and Black Hippo."
Horiguchi: For me, it has to be "Hawron." He's modeled after me, after all.
Ishikawa: I actually don't really know any of the characters (laughs).
Sekikawa: Same here. But since there's a "legendary shepherd" in the game, I'll pick that (laughs).
Sekihara: My favorite character is probably the boss "Bone to be Mild."
Konya: I like how nobody said "Pom."
Takazawa: Then I'll say it. My favorites are the Poms (laughs).

Mr. Horiguchi smiles shyly as he tells us he was the model for the character Hawron.
—Could you give our readers some tips regarding the Community Mode?
Hayasaka: To me, it's all about the looks. Focus on making it look nice.
Higashida: Make sure to build brick and stone houses. The stronger your Poms, the better.
Ogura: If a building is destroyed in a disaster, make sure to repair it as soon as possible.
Horiguchi: First thing you should do is create the Field. Then you won't have to worry about food any more.
Hayasaka: You should always return to the Community every time you complete an adventure.
Ishikawa: I've never played Community Mode myself, so I'm taking notes...
Sekikawa: Now I know how to play the game (laughs).
Sekihara: I say build a lot of stone houses. It's better to have powerful Poms.
Higashida: You really want to get the "Golden Scarab" from the trader. That'll make the game easier.
—Before we wrap up the interview, do you have any final words for the players?
Sekihara: Never give up, and keep trying until you win. There's always a clue somewhere.
Sekikawa: This seems like a fun game (laughs), so I hope you enjoy it!
Ishikawa: Check out the Moom disaster if you can!
Horiguchi: I hope you'll play the game from start to finish.
Ogura: Do check out all of the characters' faces.
Higashida: Please enjoy all the details in the magic spells and actions.
Hayasaka: We hope you'll keep enjoying the game even after you complete it. We would be flattered if you created fan content like comic books.
Konya: I'd like you all to keep enjoying the game.
Takazawa: We poured our hearts into the game, so we hope you enjoy playing it.
—Thank you all for your time.
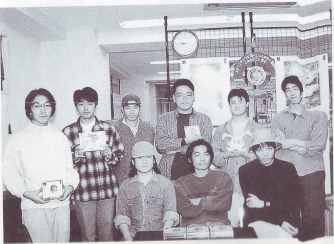
The staff poses for a photo in front of a "Community Pom" poster.
Setting Materials
Here we have collected the rough sketches of the unique characters of "Community Pom," drawn before they were put into the game, with comments from the character designer, Mr. Higashida.
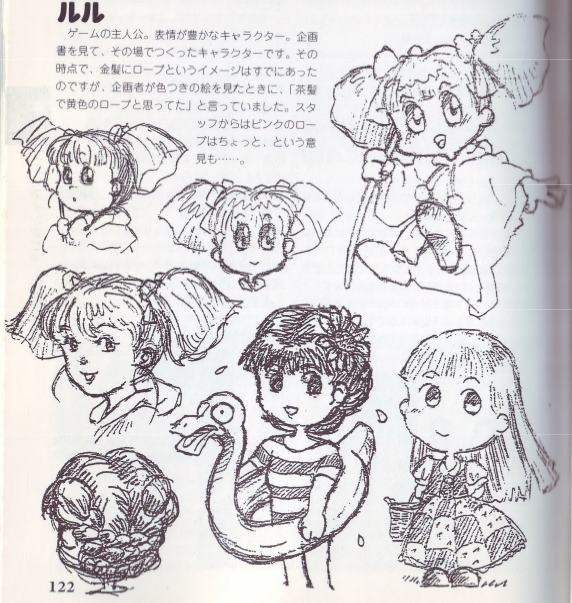
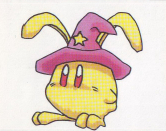
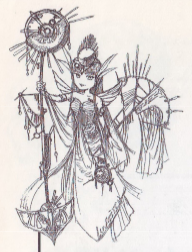
Lulu
The game's protagonist. She's a character with very rich expressions. Once I read the game's proposal, I immediately drew her on the spot. At the time, I already had this picture of a blond girl wearing a witch's robe. When I showed the rest of the staff the colored art, they told me "We thought she'd have a yellow robe to go with the blond hair." In fact, they didn't like the pink robe at all...

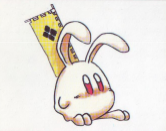
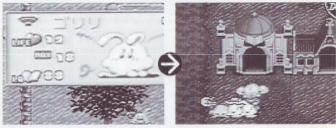
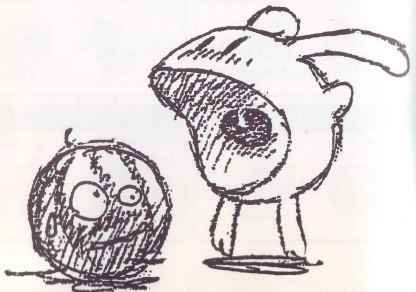
Poms
The original concept looked different, but once it was decided that they would come from the moon, I made them look more like rabbits. However, there are plenty of creatures with rabbit-like features in media. In many of my takes, I realized that I had drawn something that was too similar to characters from other game franchises.
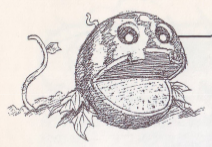
King Mellon
As the name implies, it's the boss of all Mellons. In the plot, it's being controlled by "Wicked Feelings," a bug on its head.
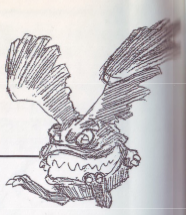
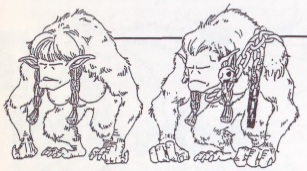
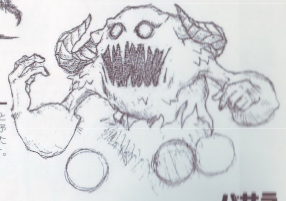
Moom
The basic concept for this design was Pom + fallen angel. In my head, I had this idea of a situation similar to the movie "Gremlins," with the mild Poms turning into the wild Mooms in the Community, but in the end you don't really see a lot of them, which is a shame.
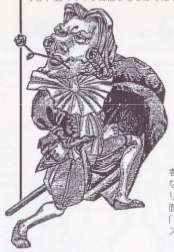
Coloron & Hawron
These characters are modeled after a certain person from the development team (laughs). We picked this design during the proposal stage of the project. Since the design was more or less based on an inside joke, I didn't actually think it would end up in the final game.
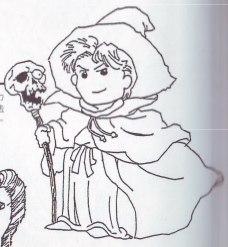
Sivil
Lulu's rival. He's a bad kid who wants to take over the world. The idea is that he comes up with a plan, the plan fails, and Cackleca (his sentient staff) makes fun of him.
In the original concept, his origins were unknown, and he would always be one step ahead of Lulu to get in her way, but this concept was changed during the project.
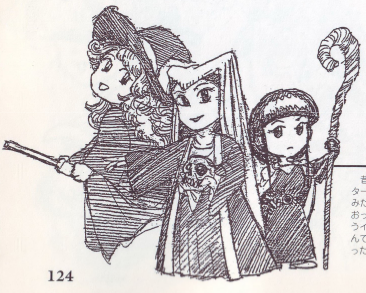
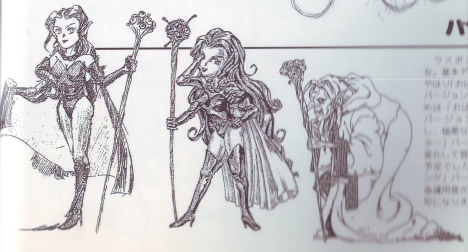
Majocal Sisters
They're inspired by a certain villainous trio from an old anime. I designed them as three typical witches. Personality-wise, the elder sister is the leader, the middle sister is the calm one, and the younger sister is the rebellious one. I really liked their concept, but unfortunately, they never became major characters.
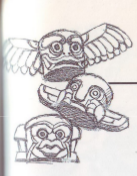
Tonga, Temmy, and Pola
Three gods combined into one. They all have individual minds, so they can have conversations (that end up being comedy routines). I based their concept on a totem pole, after which they were also named.
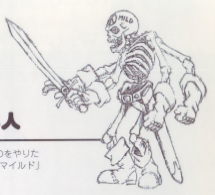
Bone to be Mild
A member of the development staff really wanted to have a sword-wielding skeleton golem, so we implemented it into the game. Since it was originally called "Bone to be Mild," I decided to give it a rocker vibe. (Editor's note: The Japanese name for this boss is Honehonejin, literally "Bone Bone Man," and it's also sometimes also referred to as Honehone Rocker, "Bone Bone Rocker." Since we needed to localize it for the translation anyway, we just used its prototype name instead.)
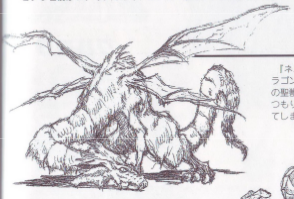
Moondragon
This concept was inspired by the dragon from "The NeverEnding Story," but with a more classic design. Originally, it was supposed to be the sacred beast of the Moon, capable of understanding human language and communicating with Lulu, but in the end it was just made into a normal monster, which is really a shame.
Wicked Feelings
The true final boss. In the original game concept, after defeating Vajra, Wicked Feelings would come out and there would have been a happy ending, but then it was decided that this would be the last boss, so I designed it very late during development. Its design concept is "evil spirit."
Vajra
The last boss. Of course, the basic design is the old lady version. In the original concept, she was supposed to only appear as the old lady, and then transform into an evil monster, but then they asked for a more appealing younger version, which I hastily designed, and that's what ended up in the final game.
Seravy
The Moon Goddess, imprisoned inside Castle Vajra. When I designed her, I decided to make her into more of a "symbol" than a normal person, which is why she gives off such a powerful vibe. I never thought she'd be captured by someone like Vajra.
Pierre
They told me I could do whatever I wanted for this character's design, and so I did (laughs). The idea is that of a lazy aristocrat who tries to be fashionable, but goes overboard and ends up looking gay. He's actually a nice person, but he doesn't have any friends. When I designed him, I was thinking about the synergy between him and his old caretaker, the only person who understands him, but in the end he didn't end up being a major character.
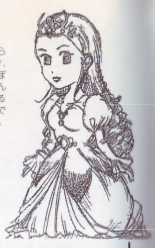
Cruela
Unlike Pierre, she's very popular with her citizens. My original concept was that she'd have a personality the complete opposite of her appearance; she'd be very pretty, but also very mean. In the end, she didn't turn out to be particularly mean in the final game. It's not easy to express a person's hidden thoughts in a drawing. I drew her like the kind of woman who'd hide thumb tacks inside someone's ballet shoes.
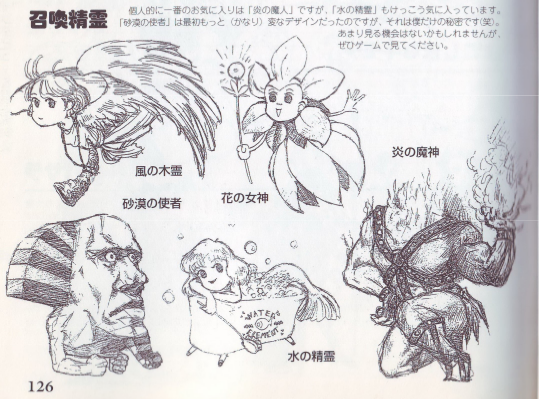
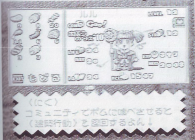
Summon Spirits
My personal favorite is the Fire Genie, but I also like the Water Spirit a lot. The Desert Messenger's original design was much weirder, but I'm the only one who knows about it (laughs). Since they only show up when you use certain items, you won't see them often. I hope you'll use the summon items to check them out in-game.
Clockwise from top-left: Wind Deity, Flower Goddess, Fire Genie, Water Spirit, Desert Messenger
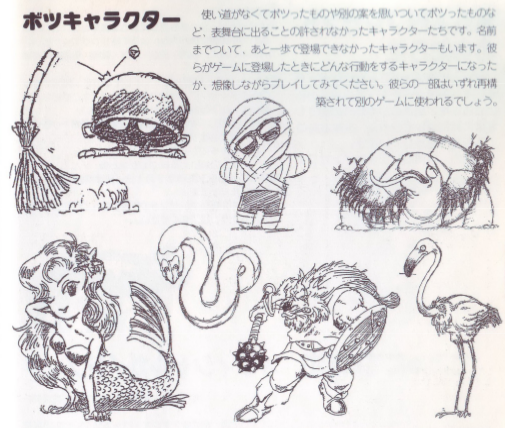
Rejected Characters
These are the characters that were not put in the final game. They were either rejected because there was no need for them, or because the original plan was changed. Some of them even had names, and might have been implemented if things had been just a little different. Sometimes I like to imagine how they would have acted had they been implemented in the game. Some of these designs will most likely be repurposed for future games.
●● Perrier ●●
~ Ending Theme ~
Lyrics by: Kaori Sato
Composed and arranged by: Hideki Tobeta
咲いてた花さえも
枯れてゆく少しずつ
綺麗な命は
せつなくはかなく
全てが嘘だから
2度目はありえない
哀しいことでも
夢でもかなわない
オイルには憂鬱を混ぜて
精密な機械のように
最期まで続いてしまう
現実のボタンをとめて
透明な水のなか
移りすんだ魚たち
見えすぎる現実に
嘆いて目をふせる
saiteta hana sae mo
karete yuku sukoshi zutsu
kirei na inochi wa
setsunaku hakanaku
subete ga uso dakara
nidome wa arienai
kanashii koto de mo
yume de mo kanawanai
oiru ni wa yuuutsu o mazete
seimitsu na kikai no you ni
saigo made tsudzuite shimau
genjitsu no botan o tomete
toumei na mizu no naka
utsurisunda sakanatachi
miesugiru genjitsu ni
nageite me o fuseru
Even the flowers that were in bloom
are withering away, little by little
The more life is beautiful,
the more it is painfully short
Everything is a lie;
you never get a second chance
As sad as it is,
dreams never come true
We live like machines,
fueled by depression,
forced to live forever,
until we press the "End" button
The fish that have moved
to crystal-clear, transparent water
turn their eyes away
to avoid facing this harsh reality